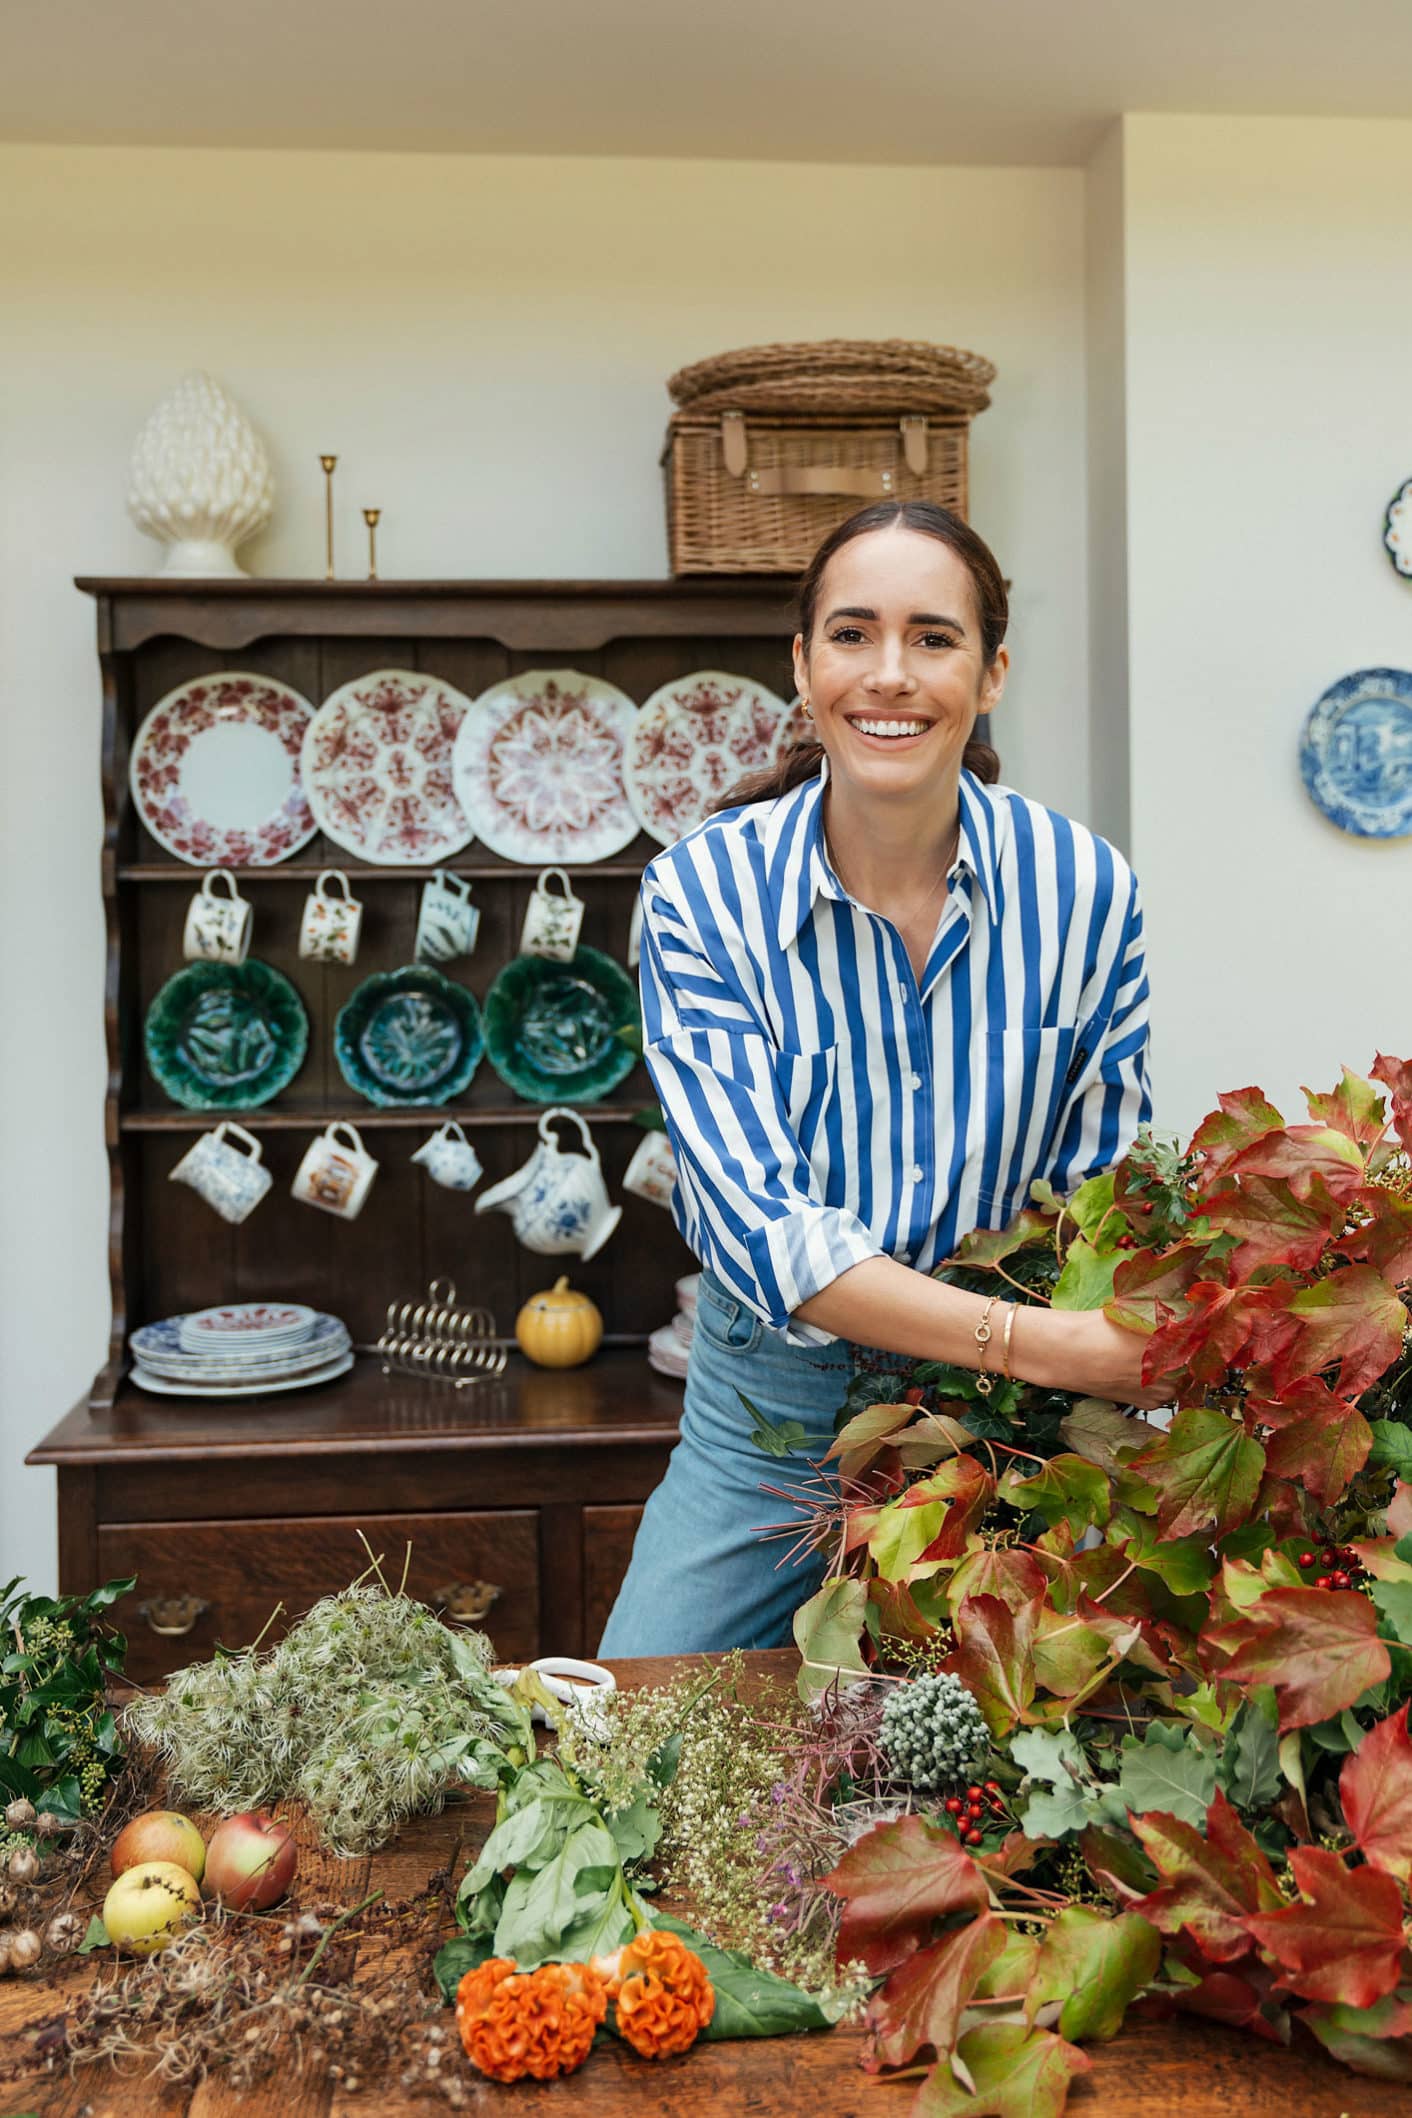
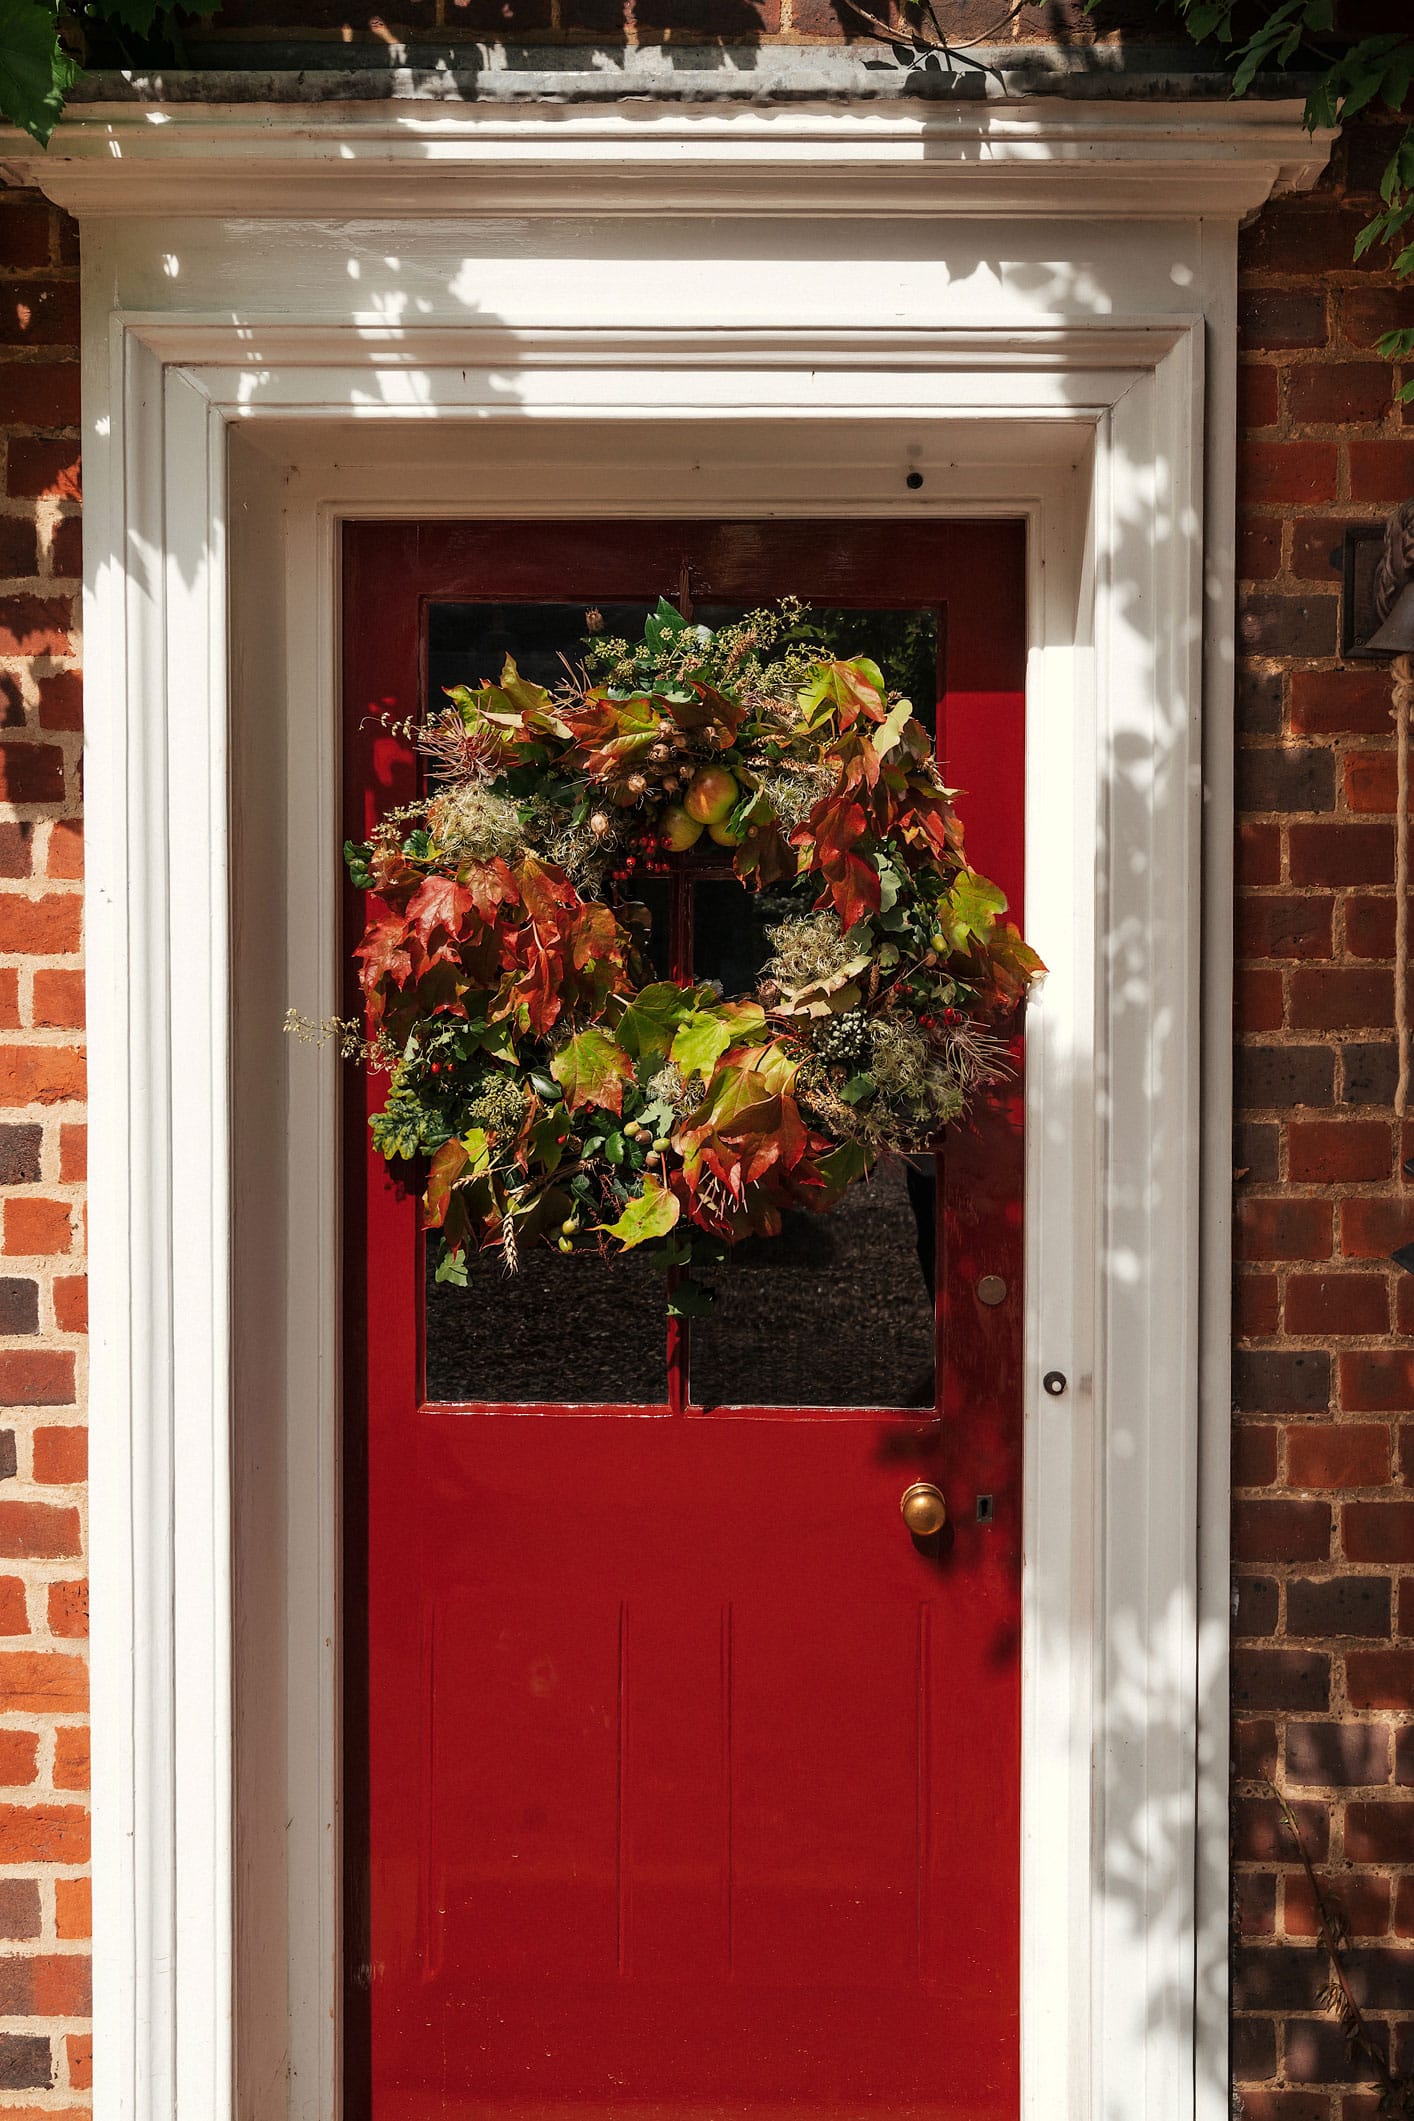
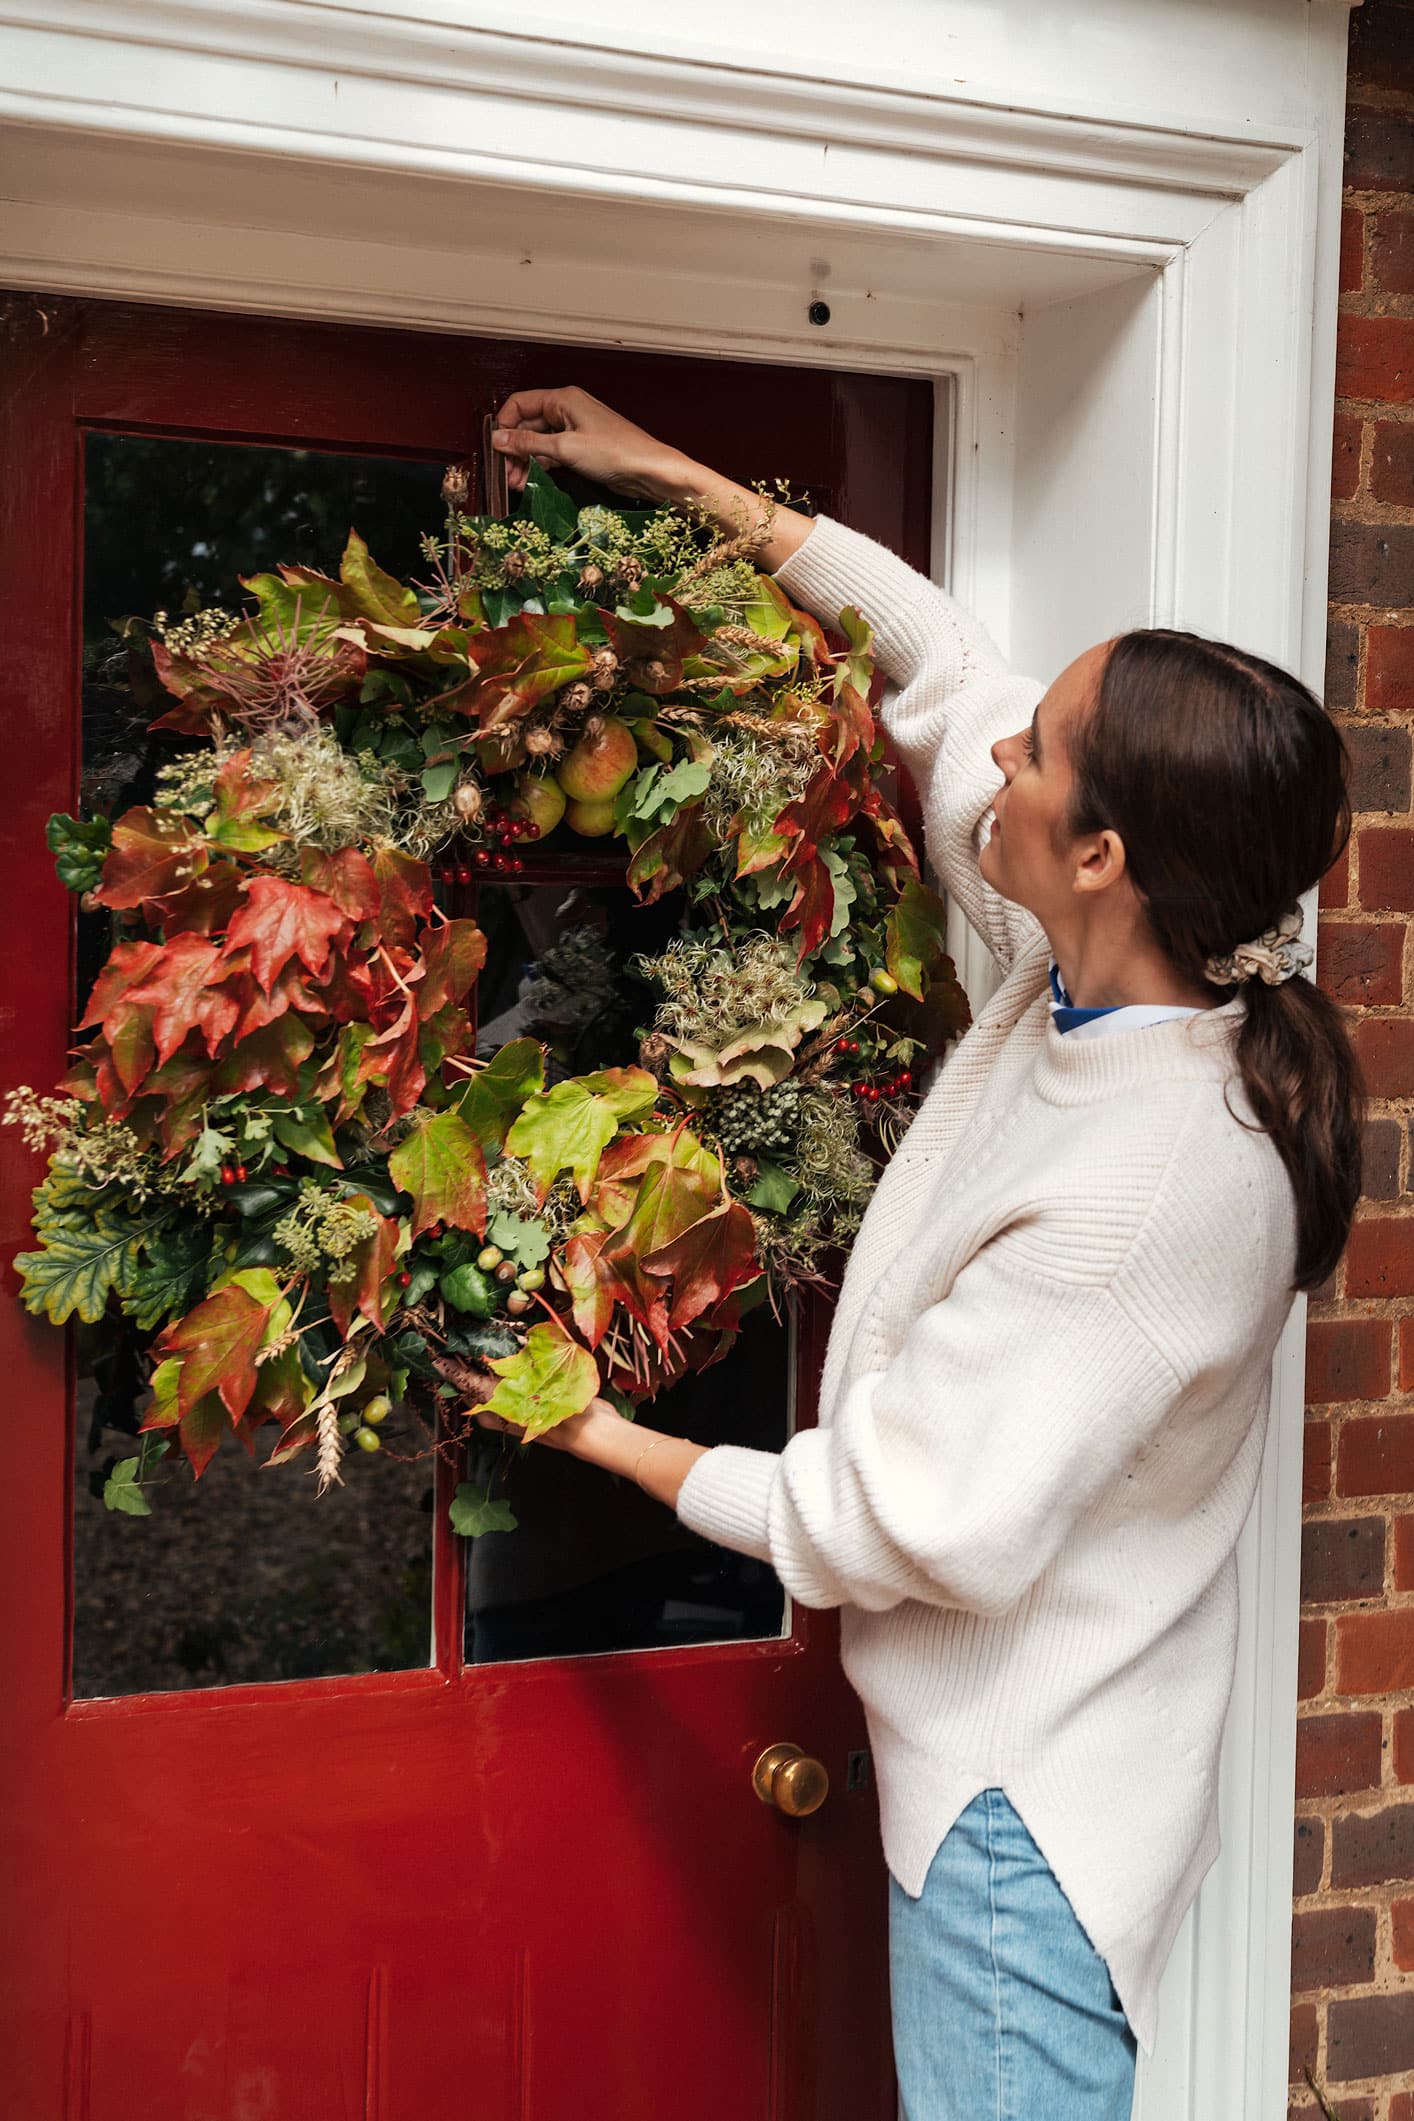
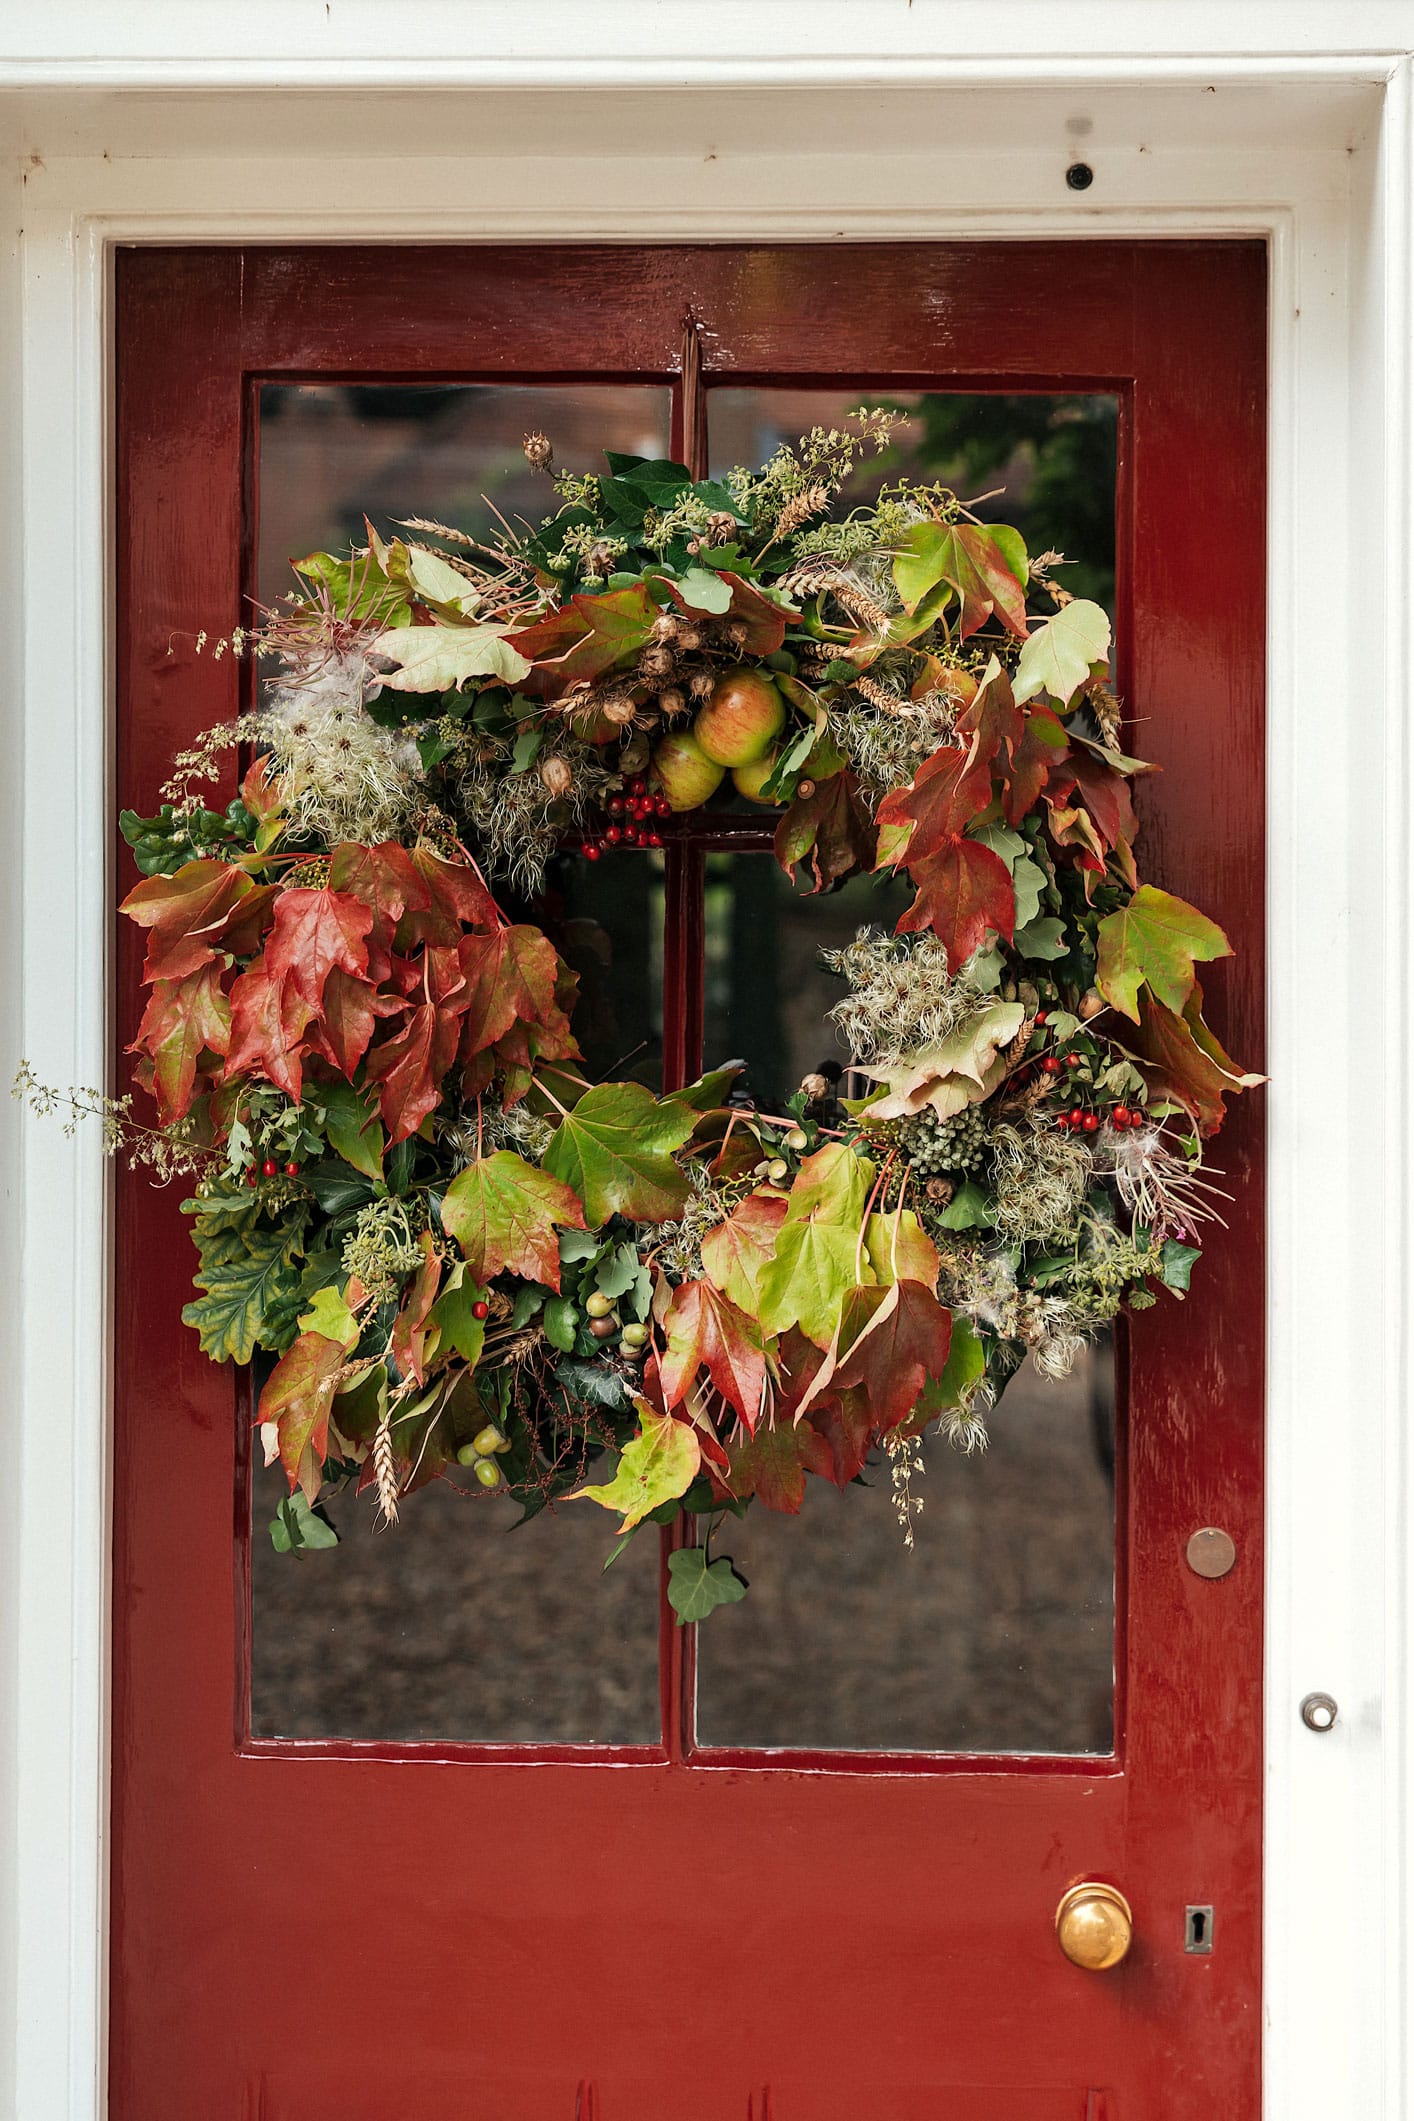
Autumn colours are some of the most beautiful when you put them all together. On our weekend walks Mackenzie, Honor and I collect bits of foliage, colourful leaves and twigs that have fallen off trees and bring them home to make things out of. As you can imagine, we rarely actually get round to making anything so last weekend I was determined to make use of our collection and put together an autumn wreath DIY. I’m so pleased with how it looks and it works perfectly with our red front door. Although it’s full of autumn colours and fiery October shades, it’s making me excited for the holidays and what I’ll do for my Christmas wreath. See how to make your own autumn wreath DIY below.
It’s actually a lot simpler than it looks to make a bushy autumn wreath as most of the thing you’ll need can be found in and around your house. If you want to make your own wreath frame you can use twigs wrapped around wire to create the shape you want. Make sure the twigs are long and bendy (nothing that will snap!) as you can manipulate these much more easily. If you’re short on time or you’re not convinced by your wire and twig abilities then you can buy either a willow, twig, grapevine or wire wreath from a home craft store or from Amazon.
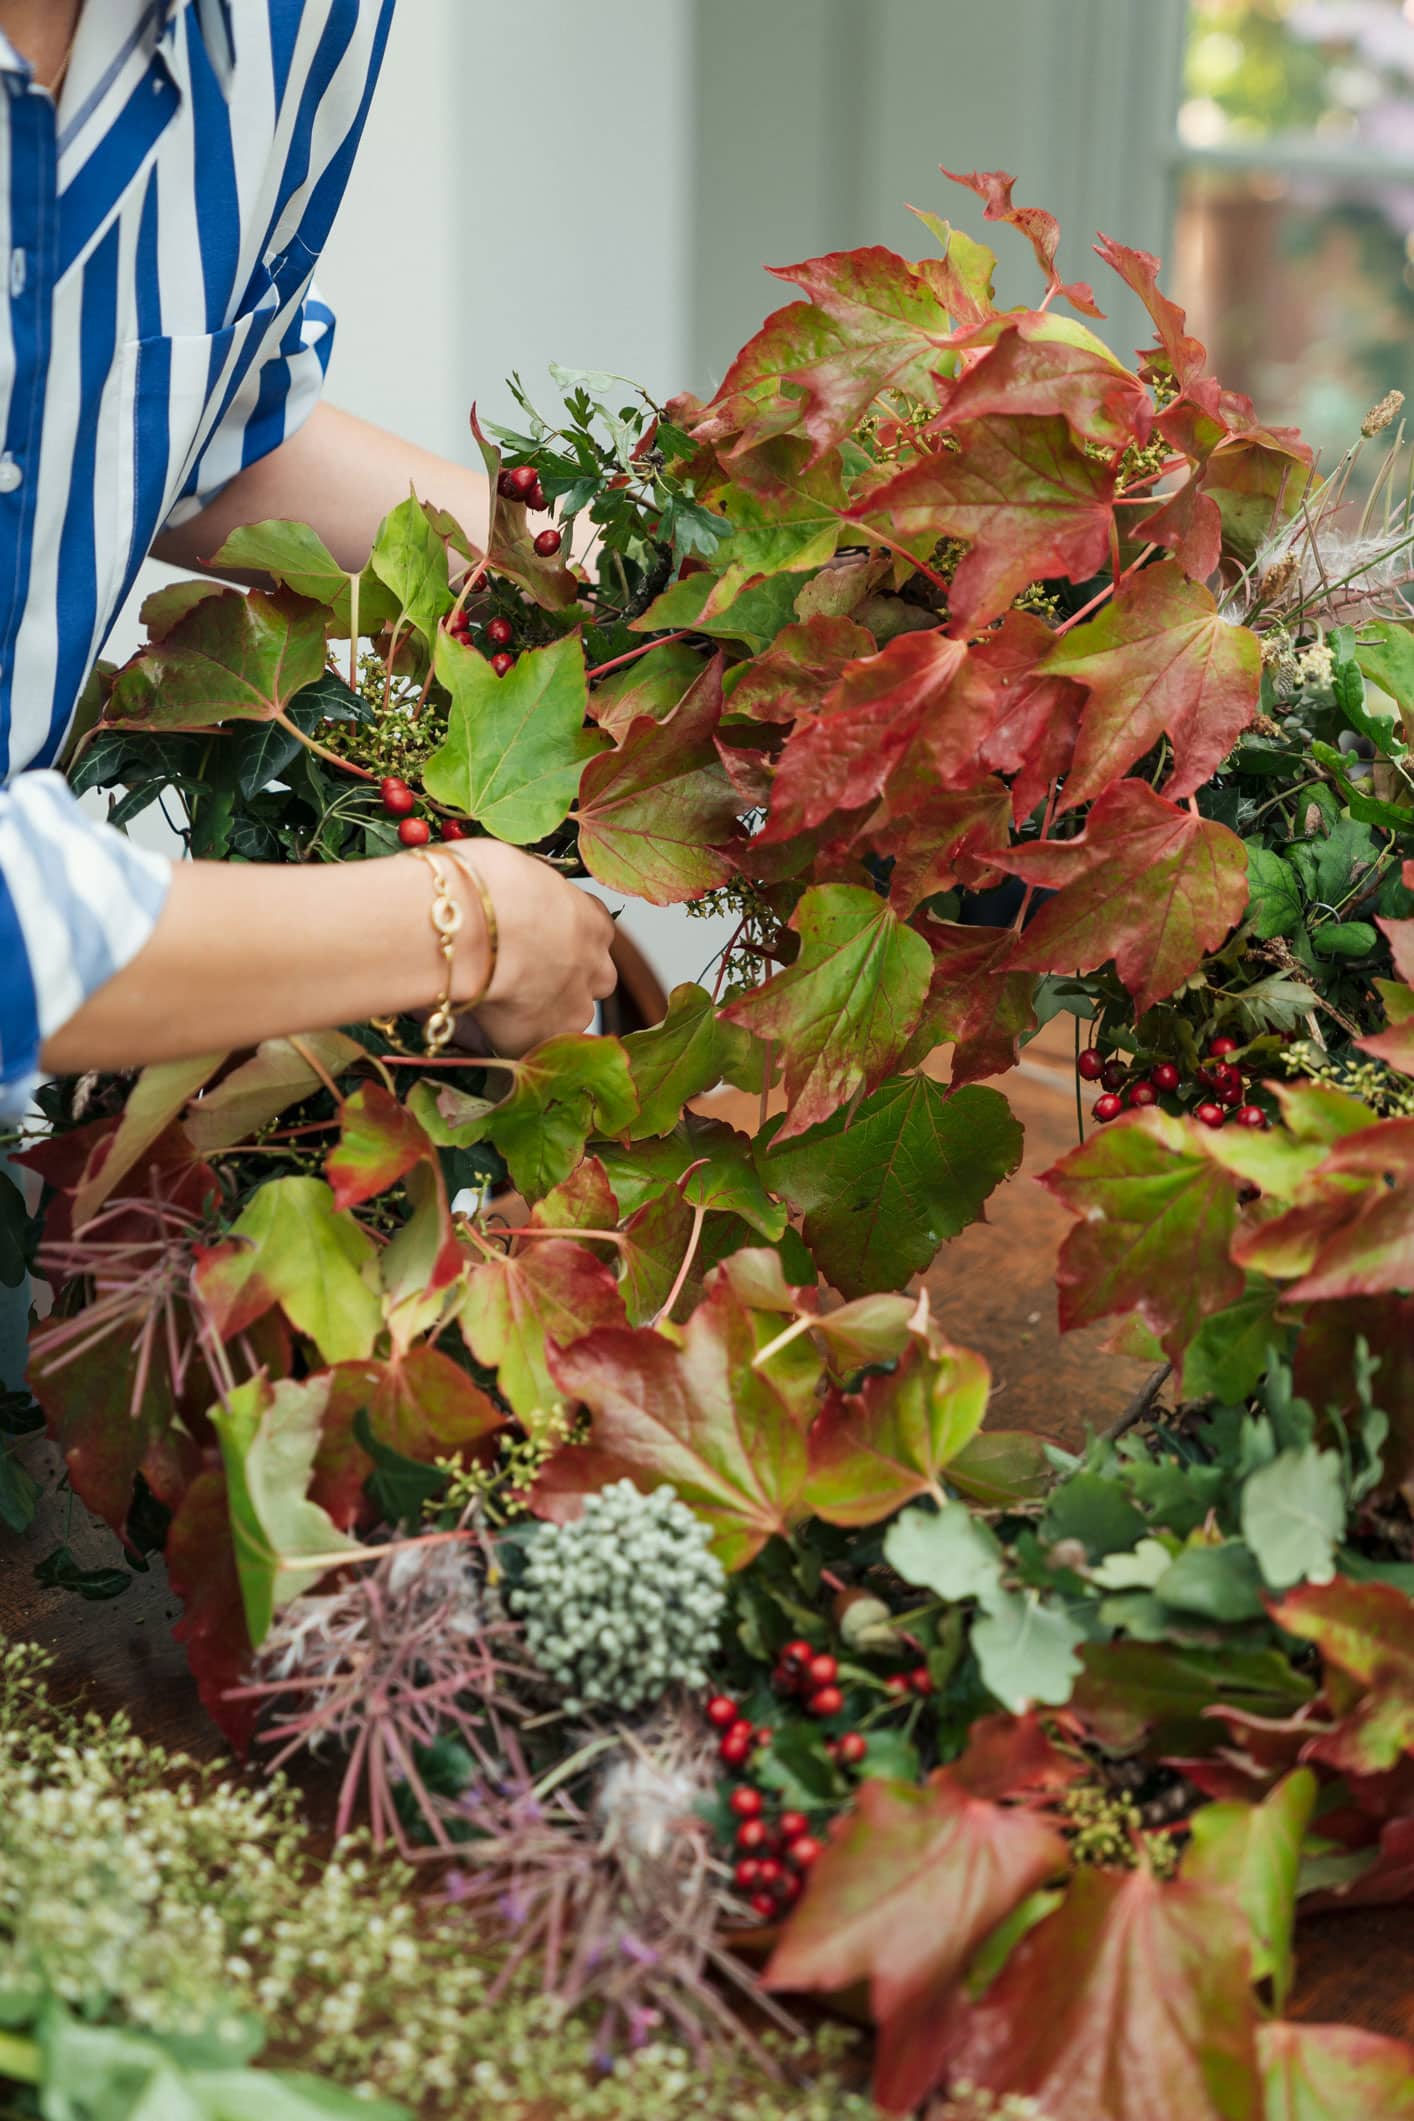
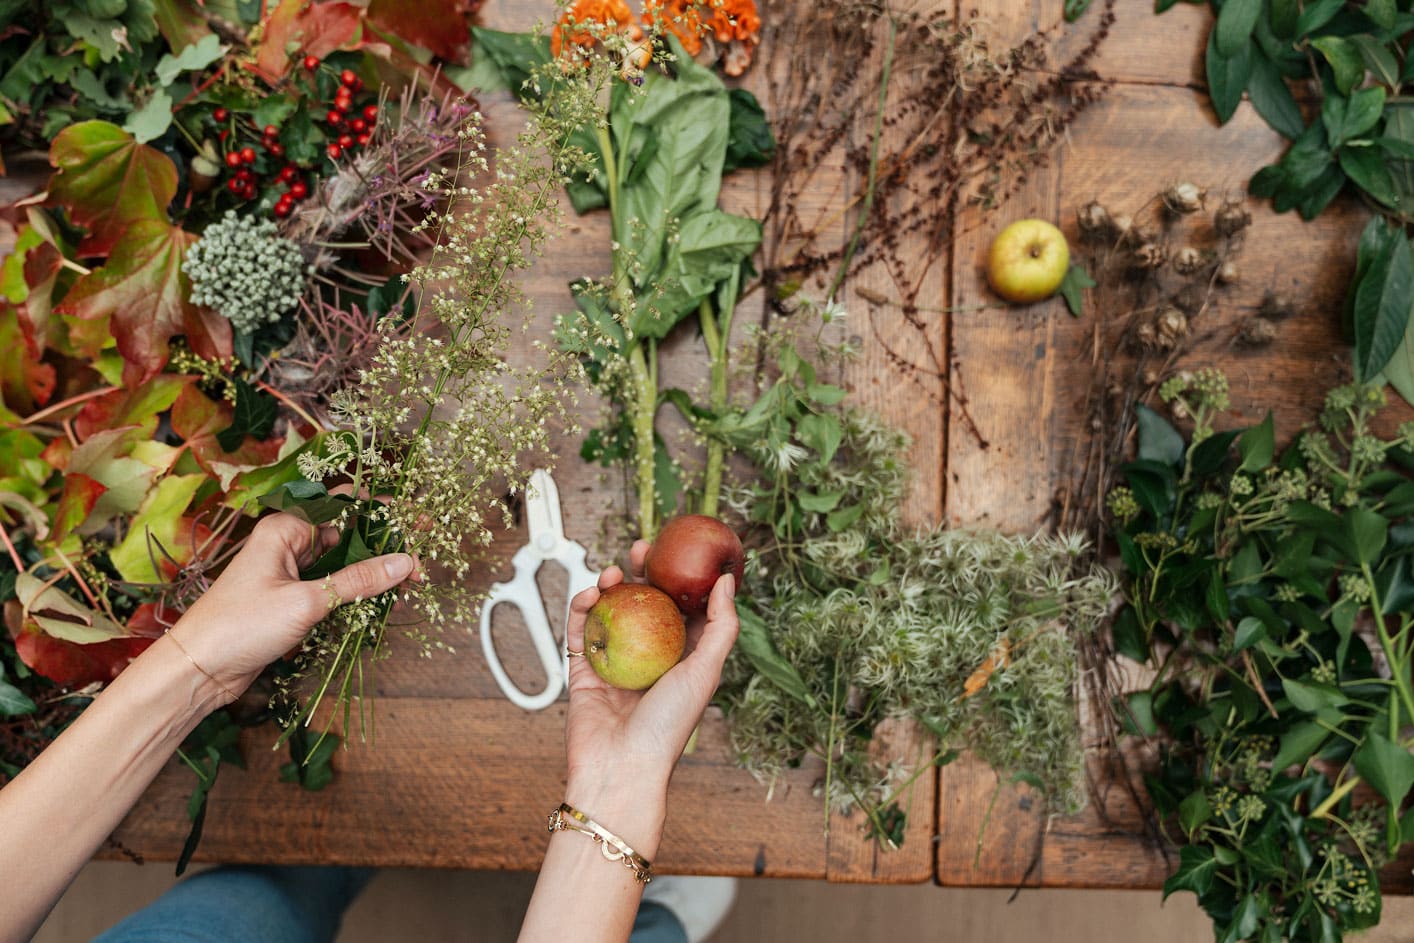
Once you have your frame, separate your bunches of leaves and flowers so that you’ve got smaller bunches. Keep stalks as long as possible so it’s easier to manoeuvre them and the bunches can be different sizes- you don’t want your wreath to look too perfect! Start tucking your base layer (probably go for the biggest) into the frame all the way around, following the shape of the wreath and keeping your leaves, stems or flowers facing the same directions. This is where you get the lovely swirl shape from. Use a glue gun to stick down any unruly leaves so you have as close to a circle as possible but there are no rules; just do what you like the look of! Lay your next layer on top and work out where you want each bunch or stem to go. Then follow the same procedure and tuck the stems into the frame, following the same direction again.
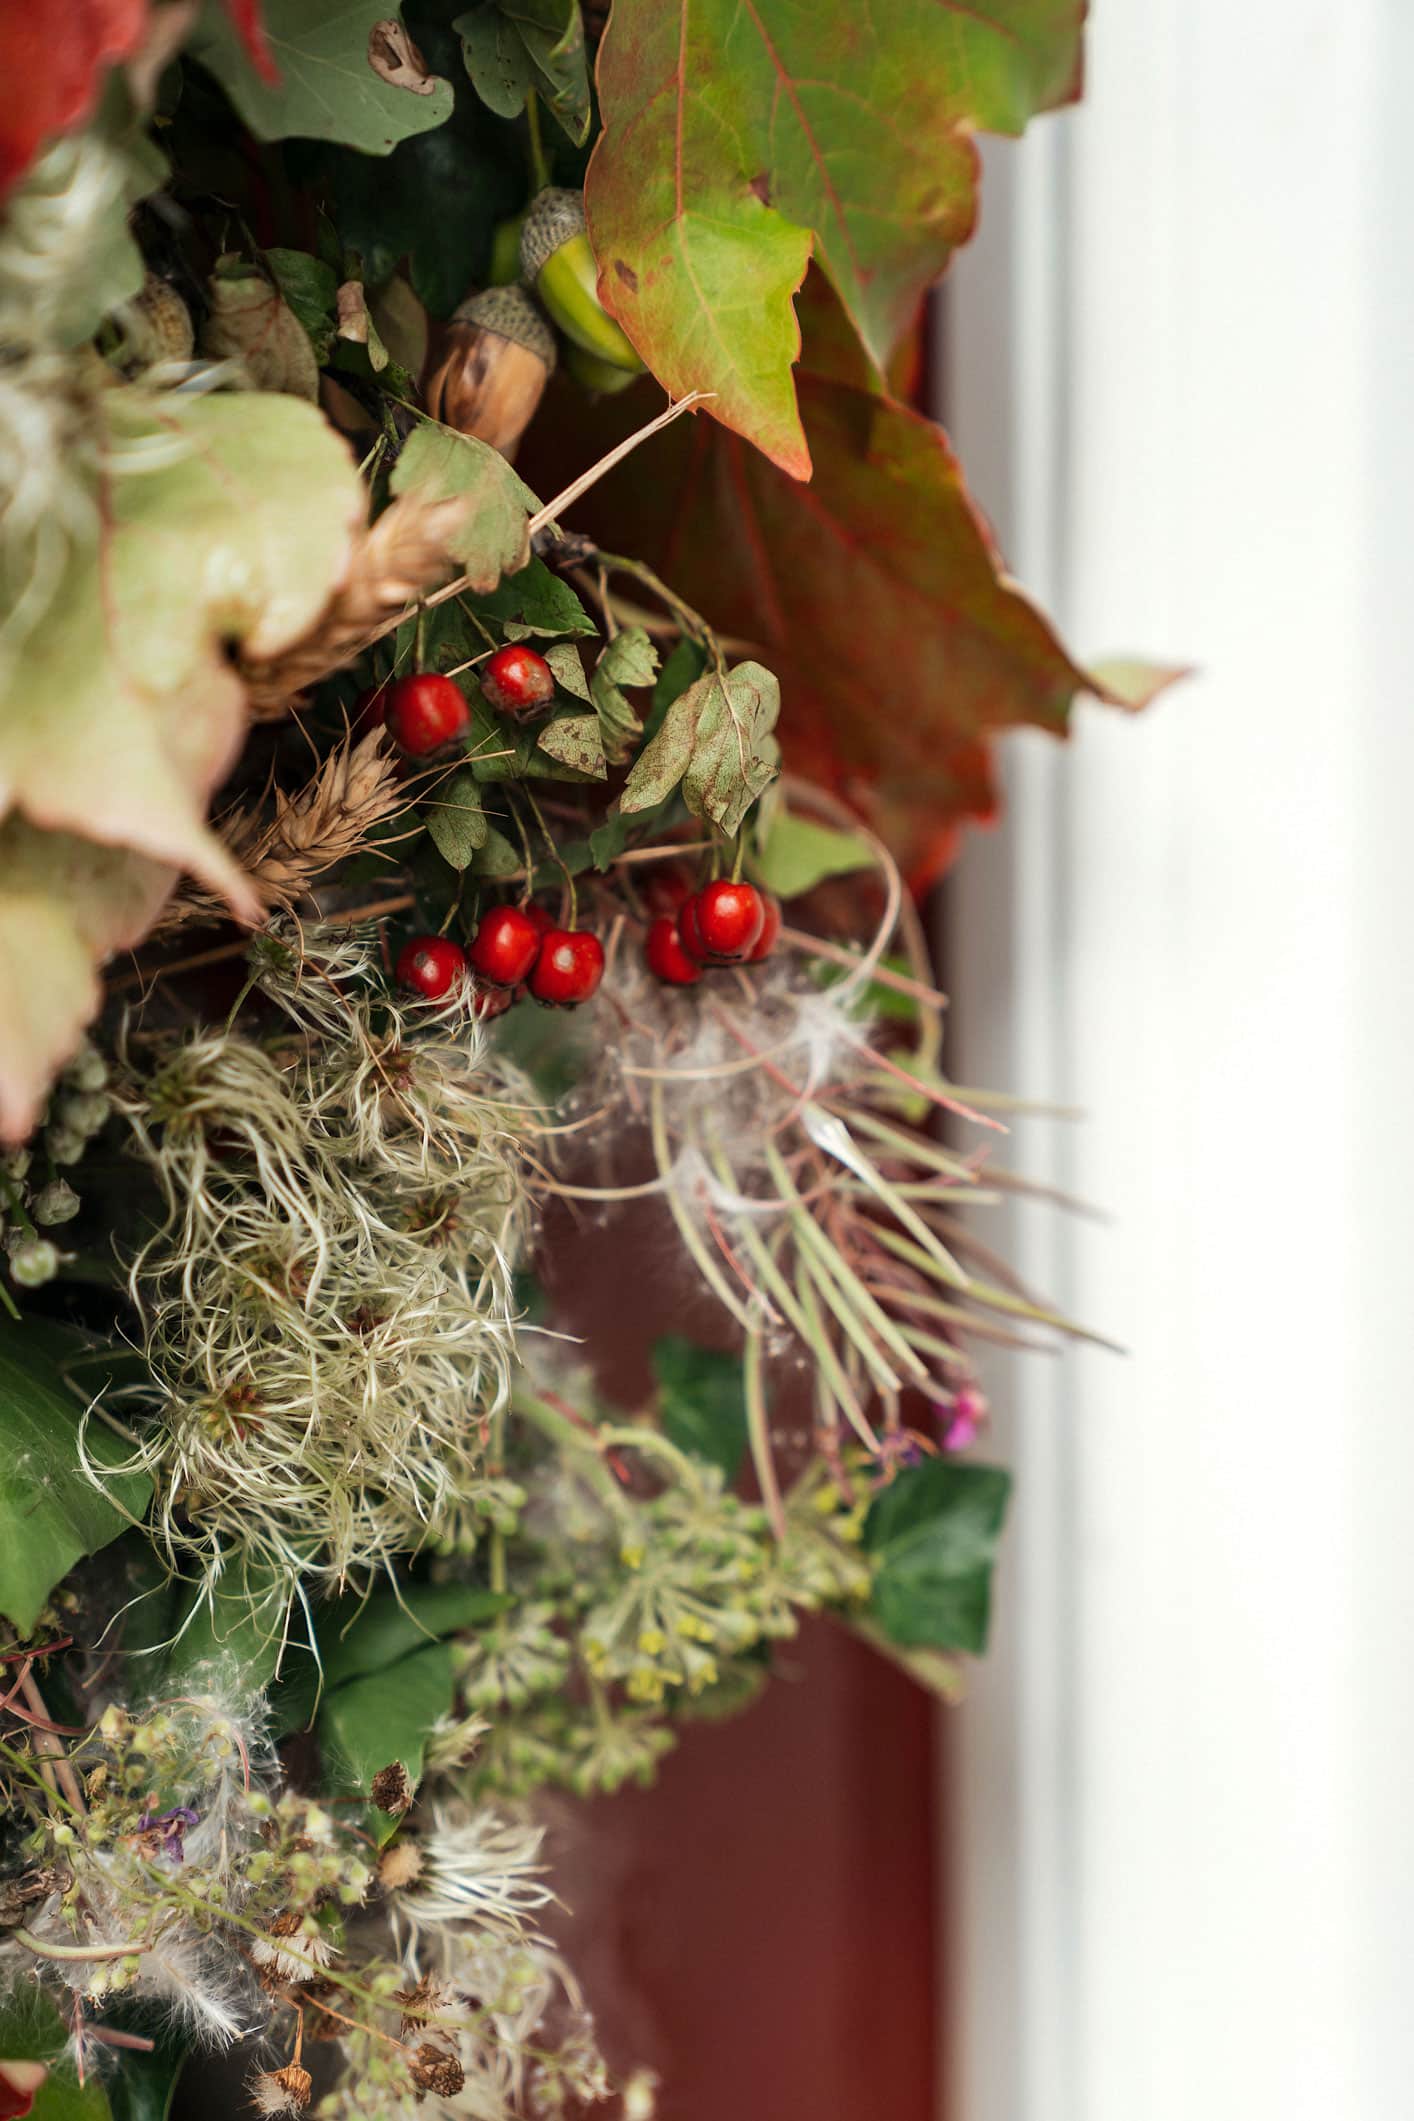
Keep things like berries in slightly larger bunches as you can tuck these in underneath the layers so that they just poke out from the sides. Make sure any berries you pick are safe and if in doubt, get fake ones. The last thing you want is for any little helpers to tread bright red berries into your carpet.
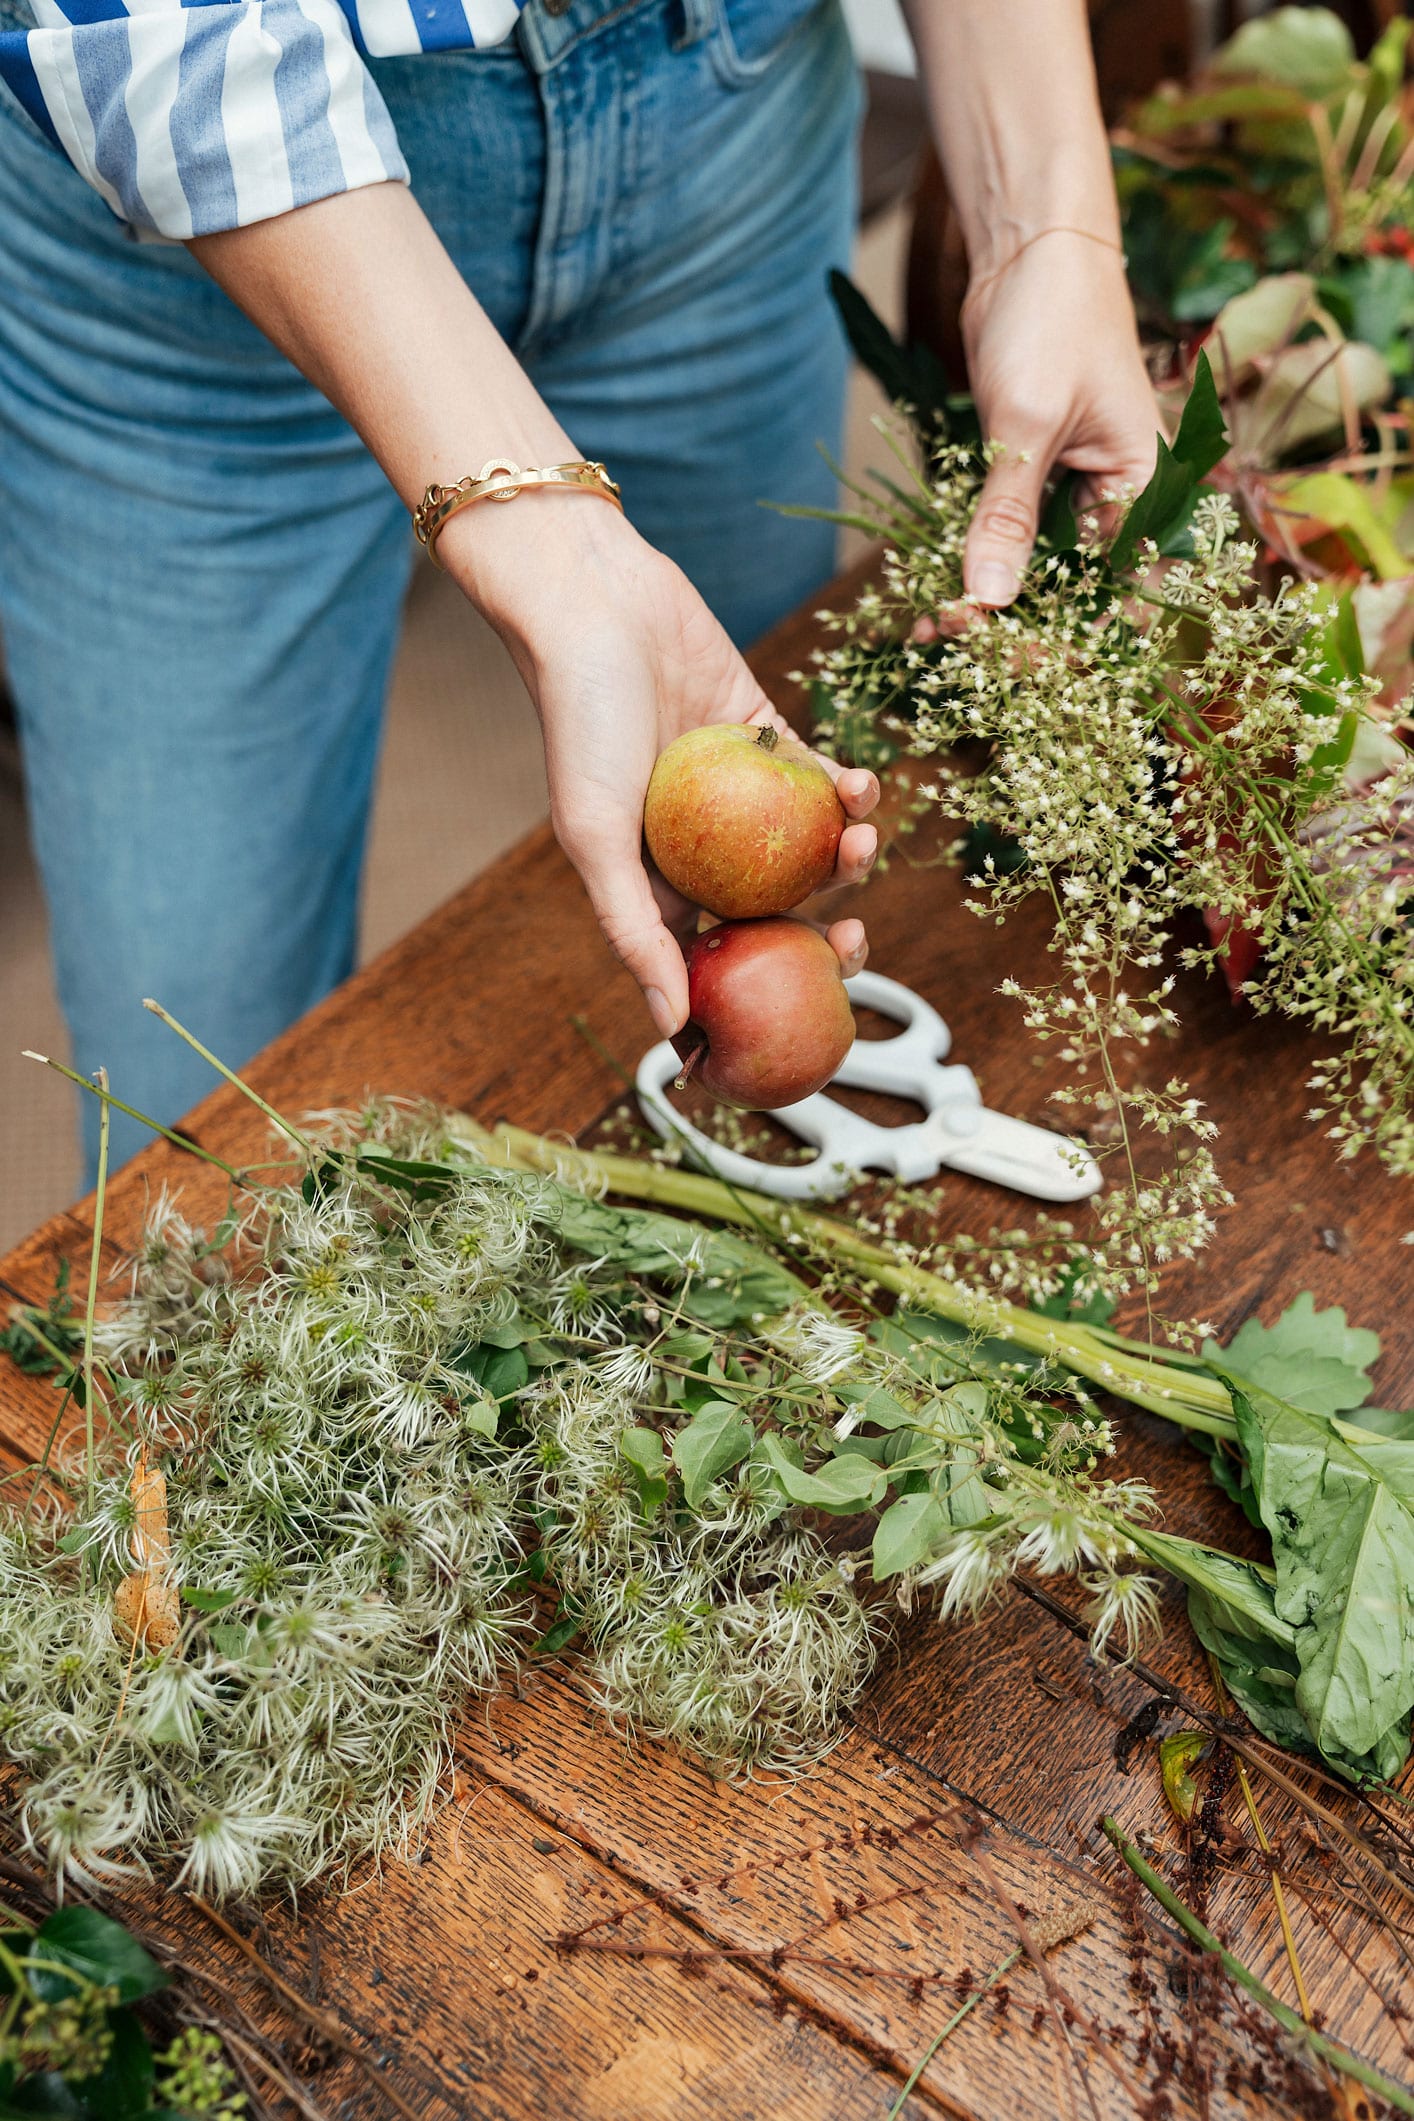
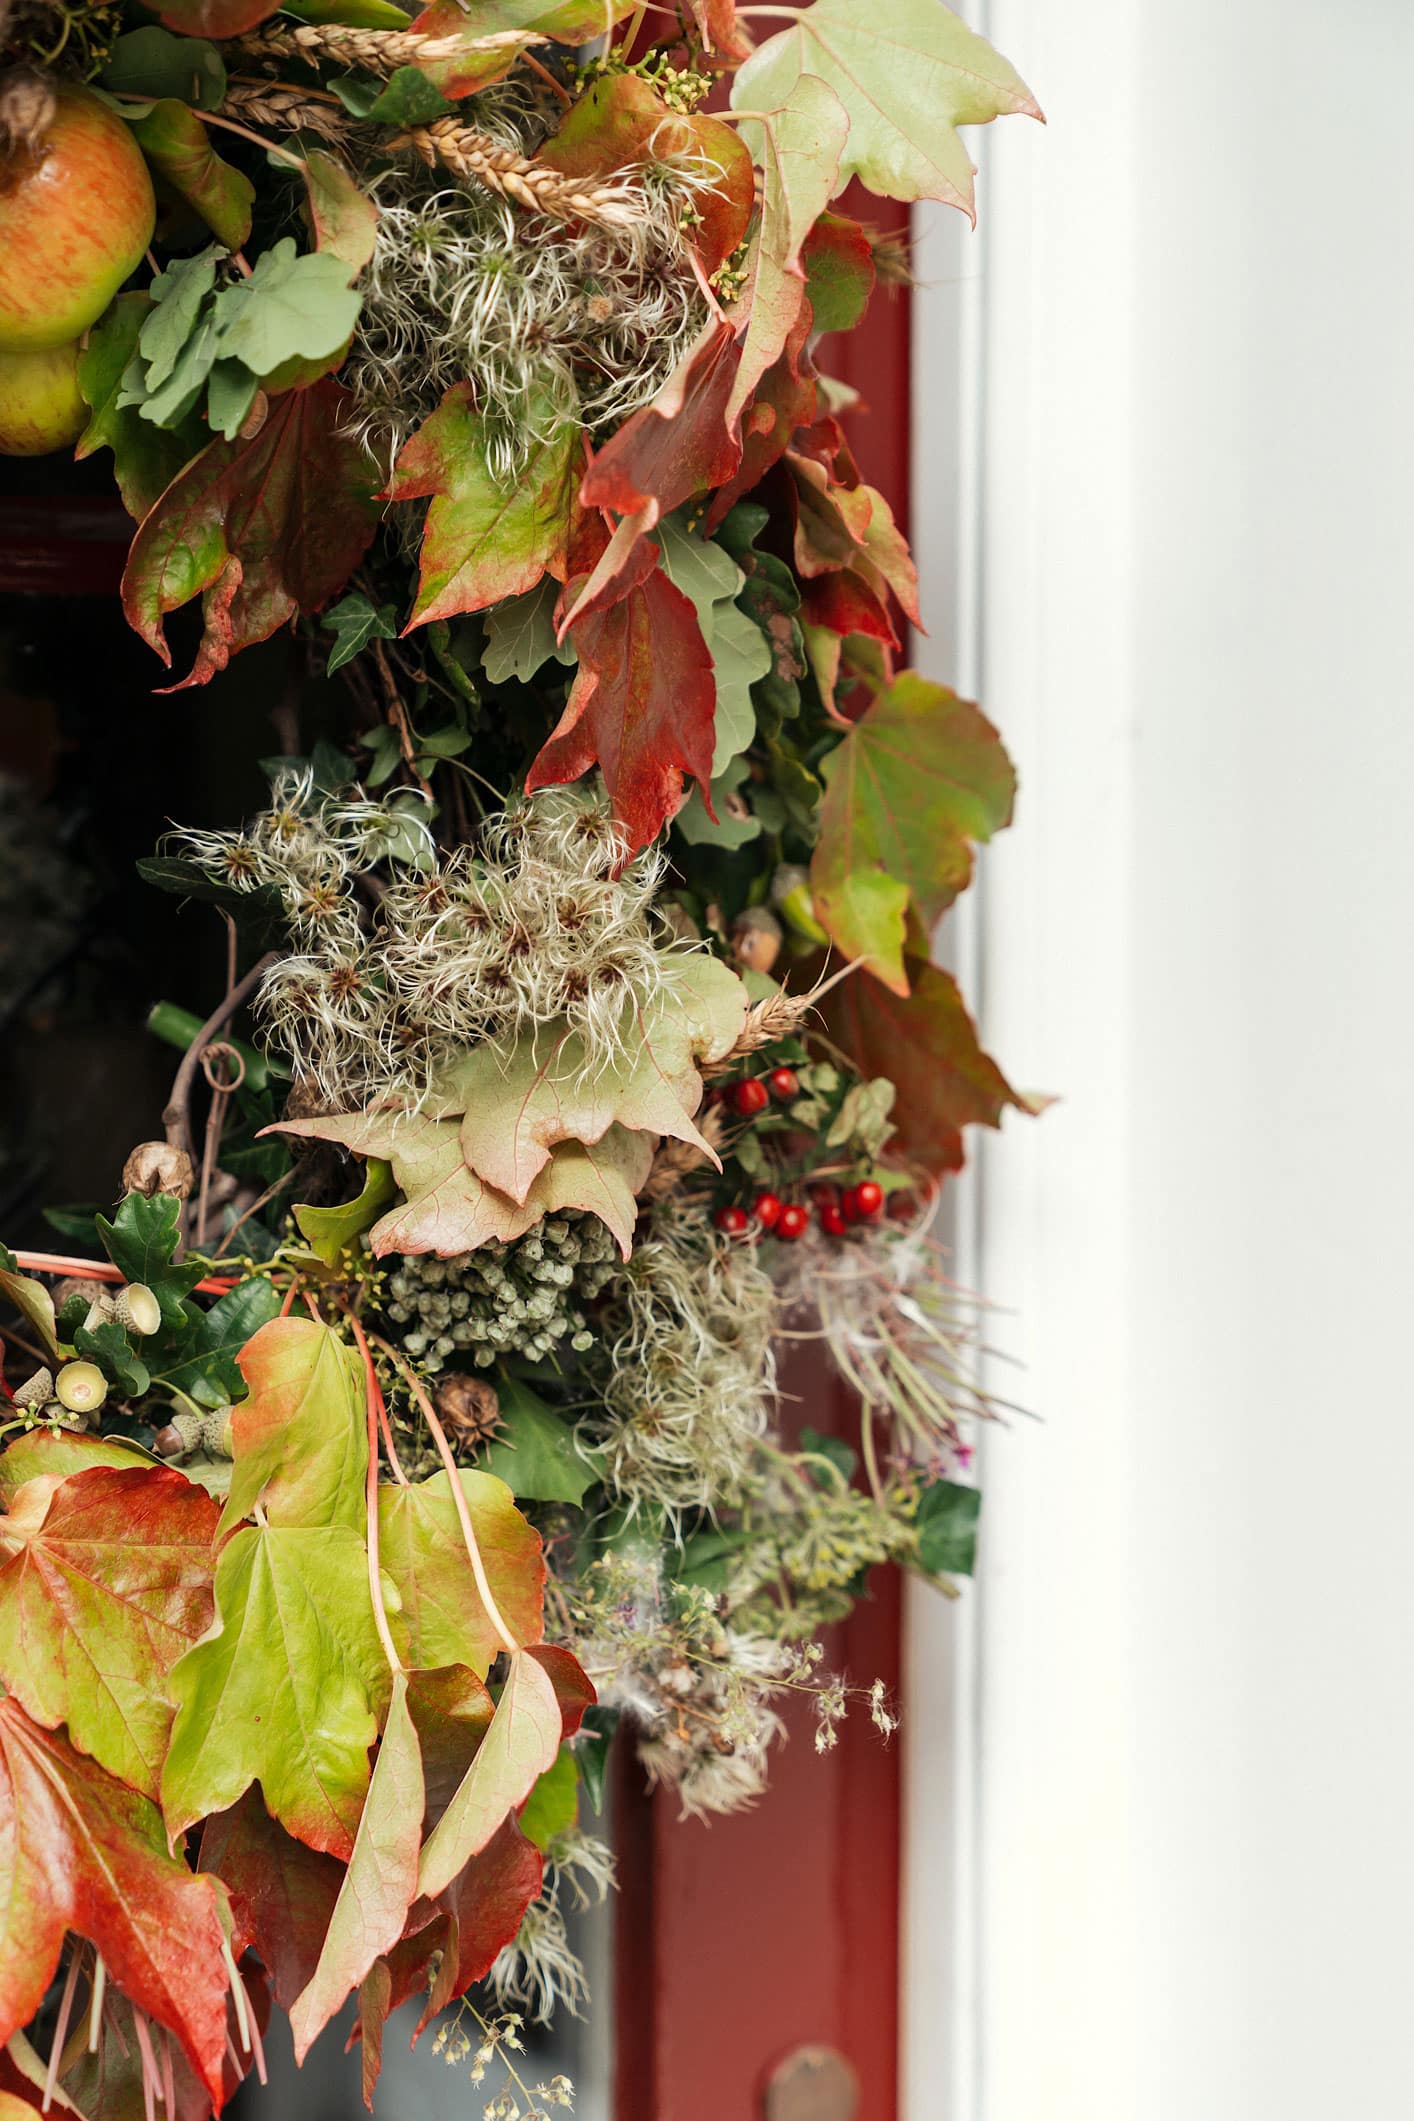
Finish off your wreath by adding different textures and shapes. I included some apples and acorns in mine but pinecones are also a great choice- attach these with a glue gun or with wire if you can (safely!) pierce a stalk and wrap the wire through the fruit and onto the frame. It’s the only fiddly part!
When you’re finished and happy with how it looks, double wrap a bit of green wire through the top of the frame and then wrap the other end around your door knocker and voila! A beautiful autumn wreath DIY. The more colours the better, really mix up the things you include and collect more than you think you’re going to need- you can always fluff it up by sticking in any leftover bits or make a smaller wreath for inside.
What I’m Wearing: Shirt by Uterqüe, Jeans by Everlane, Jumper by The White Company, Hair scrunchie by Anthropologie
xx,


So gorgeous! What beautiful treasures you found!