
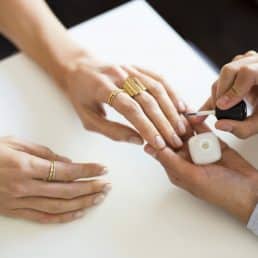
When life sometimes goes a thousand miles an hour and I need my nails done for work but don’t get around to going to the salon, I usually give myself a DIY at-home manicure. I’ve done some research on the subject and I’ve found a few tricks:
A good manicure can only be achieved with proper nail care. An easy home remedy to give your nails a boost of hydration before you start your manicure is to pour a bit of olive oil in a small bowl. Heat the oil for a few seconds (only to make it lukewarm) and dip your nails in for around 15 minutes. To finish, dry your nails, but don’t wash them with water. This will deeply hydrate your nails and cuticles, which you should regularly be looking after anyway, to make them easier to push back. Using a cuticle pusher, very gently push back the cuticles but maybe think about investing in one made of stainless steel or glass, since wooden ones might be too harsh on your skin.
Then comes filing. Avoid using a nail clipper as this can damage your nails and use a clean file if you can. File your nails in one direction only, with firm long strokes to avoid weakening them. For a professional touch, use a small drop of nail polish remover to make sure your nail is clean instead of buying special products to clean and remove any oils on your hands. As always, make sure you choose an acetone-free product and again, be conscious of the direction of your movements. Don’t rub carelessly, but rather move your cotton wool from the root to the end of your nail in a gentle sweep.
Pre polish, apply a layer of base coat. This will ensure that the nail polish lasts longer and that all the previous hydrating steps really work. More importantly, this step is essential to avoid those annoying ridges that can appear and ruin the salon-style finish that you’re going for. Once dry, apply two thin coats of your favourite nail polish, making sure you wait until the first one is dry before applying the second. A tip I always use is to lightly tap one nail against another. If they stick, they are not dry but it won’t ruin the varnish. To speed up the process you could always buy a nail fan dryer or use a drying spray, but if you want to surprise your friends with your insider beauty tips, dip your nails in ice-cold water for about five minutes. You’ll know your nails are dry when you remove them and see water beading on the surface.
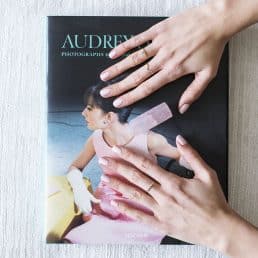
I love a phone box red but I’ve linked to some of my other favourite polishes below, as well as all the tools you’ll need to create the perfect DIY at-home manicure.


What I’m Wearing: Dress by Dôen (similar here).
xx,


Could you please tell me the name of the lovely green paint in this shot?
Hi Sarah,
It’s Lichen (No.19) by Farrow & Ball
x